Even though we completed a bulk of the work before we moved, we didn't have a spot for it in Mini House #1 and once we got to Mini House #2 it still needed hardware so I have been holding off on posting...
Spotted: Huge Thomasville Dresser on Craigslist


Large in Size, Small in Price - Only 40 Bucks!

Note: To kick this party off, remove the out-dated, brass hardware.

Next up: clean & sand

Per usual, Dorsey supervising
Note: After sanding and before priming, use tack cloth to remove the access dust / debris.

Next up: Prime & paint while wearing a mask
We are diehard fans of Rust-Oleum 2x Coverage spray paint. I've worked with other brands and none compare. Here's another tip - buy a spray paint trigger. It is the best $3 dollars you will spend, trust me.

In case you need visuals for when you go to Home Depot, Loews or your local hardware shop.

Note: For this project it took us 1 Coat of Primer, 2 Coats of Paint and 3 Coats of Wipe-on Poly. Easy as 1-2-3, LITERALLY!
 Wipe-On Poly was recommended on lots of blogs to help protect one's hard work. Here's the rub though & a word to the wise: white or antique white paint + too many coats of wipe-on poly = a slight yellowing... just sayin' :)
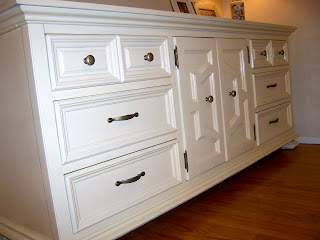


Alright if you've made it this far and haven't given up on this post - here's the after.

What an improvement!

Isn't she pretty?

Close-up (not a great one)
The total cost (excluding our manual labor) was under $100 which isn't bad, eh? It was a learning experience for us and of course we are always looking for another project / adventure.

This is absolutely beautiful! Well done (again!)...
ReplyDeletethat's pretty dern cool. looks like ALOT of work. and i love the pics you decorated with ;)
ReplyDeleteI am REALLY impressed by this one. I looks gorgeous and you get to keep the pretty woodwork from the original piece while losing the drab exterior.
ReplyDelete